规则模板
下载地址
更新时间:12/08/2024 内容: 修改了DNS
如果你此前就在使用这个配置,只需把现有的use字段到proxy-provider字段这一部分复制到新的配置来
https://clash.realiti.me/clash_template.yaml
使用方法
在其中找到以下代码段
#	订阅组合
  u: &u
    use:
    - 1.provider1
    - 2.provider2
有几个订阅就写几个,名称不能相同,序号可以不写(为了方便区别建议写上)
每个块的写法模板
  1.provider1:
    <<: *p
    type: http
# 节点文件 p1对应provider1
    path: ./proxy_provider/p1.yaml
# 订阅 链接
    url: https://blog.tyasaka.xyz/
# 自动更新时间 21600(秒) / 3600 = 6小时
    interval: 21600
# 节点名称前缀 p1
    override:
      additional-prefix: "p1 |"
我举个例子
#	订阅组合
  u: &u
    use:
    - 1.CSH
  1.CSH:
    <<: *p
    type: http
    path: ./proxy_provider/csh.yaml
    url: https://cshjc.shop/web/#/login?code=0Nxk3MfS
    interval: 21600
    override:
      additional-prefix: "CSH |"
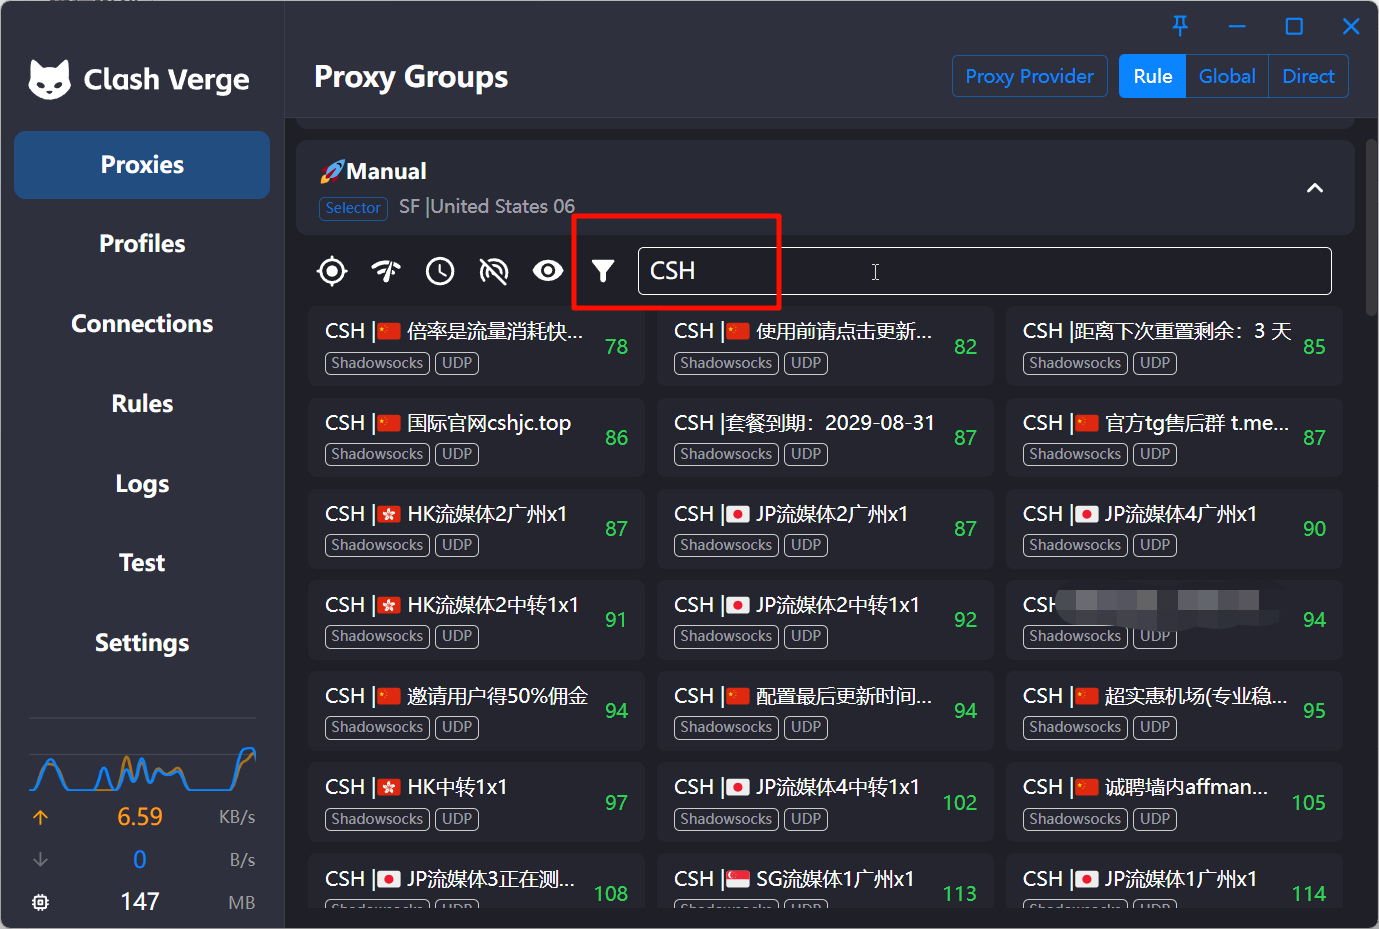
效果体验
ClashVergeREV上的快速节点搜索

自定义规则
添加规则
推荐B7规则库,在仓库目录树中点选rule/Clash就可以看到规则列表了,键盘Ctrl+F搜索你需要的规则关键词,比如Steam
找到rule-providers字段下,如图示这样的写法
复制然后改写名称, URL(URL是.yaml结尾), path
  SteamCN:
    type: http
    behavior: classical
    format: yaml
    url: "https://clash.realiti.me/steamcn.yaml"
    path: ./rule/steamcn.yaml
    interval: 43200
添加手动选择策略组
前往proxy-groups字段,从中插入一行
- {name: Microsoft-Bing, type: select, proxies: [DIRECT], <<: *u}
[ ],中可写DIRECT,REJECT 直连和阻止, 代理组名称和规则名称可以不一样
应用规则
前往末尾的rules字段,添加分流,注意分流是从上往下匹配的
- RULE-SET,Microsoft,🪁Microsoft
RULE-SET即对特定的规则集设置
这一行表示规则集Microsoft,分流给策略组🪁Microsoft
继续学习,成为大佬
Clash Mihomo内核文档 https://wiki.metacubex.one/handbook/syntax/
ClashVergeREV:便携版
ClashVergeREV2.0时期已经实现服务化,自然没有便携版了
如果你想重新下载“便携”版本,在我的仓库上基于官方dev分支最新代码进行构建
Release发布页: https://github.com/Tychristine/clash-verge-rev/releases/tag/alpha
CAUTION请先退出
Clash Verge REV以免发生意外
1.设置PowerShell能够执行脚本
以管理员身份启动Windows Terminal,没有的话自己去微软商店搜索安装
set-executionpolicy Unrestricted
2.复制保存下面的代码
# 指定Verge安装位置
$appdir = "你自己的安装位置"
$whereVerge = Join-Path -Path $appdir -ChildPath "clash-verge.exe"
$portable = "PORTABLE"
$app_id = "io.github.clash-verge-rev.clash-verge-rev"
if (Test-Path -Path $whereVerge -PathType Leaf) {
    Write-Host "Clash-Verge-REV is installed at $appdir"
    Write-Host "OK"
    if (Test-Path -Path $appdir\.config\$portable -PathType Leaf) {
        # Portable ON
        Write-Host "Clash-Verge-REV is Intstalled Portable"
        exit
    } else {
        Write-Host "Clash-Verge-REV is not portable"
        Write-Host "Change it to Portable..."
        # 新建文件夹
        New-Item -Path $appdir\.config -ItemType Directory -Value "1"
        New-Item -Path $appdir\.config\$portable -ItemType File -Value "1"
        Write-Host "Moving config data..."
        Copy-Item -Path ~\AppData\Roaming\$app_id -Destination $appdir\.config\$app_id -force -Recurse
        Write-Host "Everything is Done..."
        exit
    }
} else {
    Write-Host "Clash-Verge-REV is NOT installed at $appdir"
    Write-Host "Please install Clash-Verge-REV first"
    exit
}
exit
保存为verge.ps1文件,扩展名为.ps1后缀
编辑第二行的路径D:\portableapps\clashvergerev, 改成你自己Verge安装路径
$appdir = "D:\portableapps\clashvergerev"
在当前目录运行脚本
.\verge.ps1
3.删除以前的旧数据
运行成功后以前的数据就没用了,执行以下命令
rm ~\AppData\Roaming\io.github.clash-verge-rev.clash-verge-rev\ -r -fo


